Tutorial: Configure an alarm using a template
Templating allows the creation of many similar elements in very short time.
In the Templates App you can prepare any element of the project tree in a parameterized way for future multiple use.
While setting up the element insert variables in curly brackets at any place where you want to insert dynamic text.
In the Explorer App a template can be applied. That is, you provide a table that controls how the variables of the template are replaced for each instance of the element to be created.
Create a template
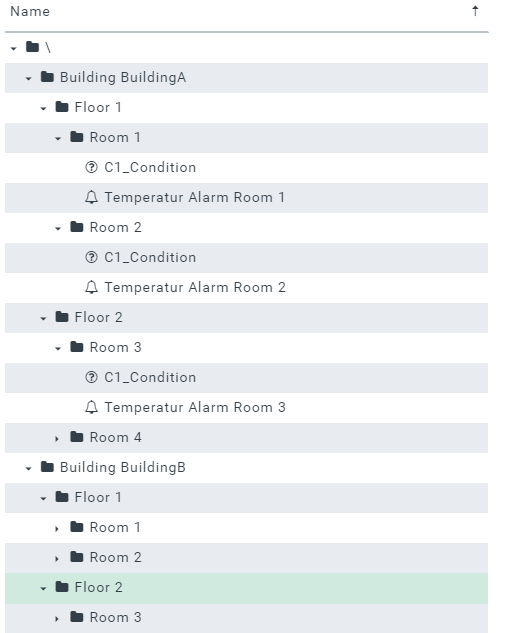
Suppose you have a building complex and want to set up a temperature alarm for each room.
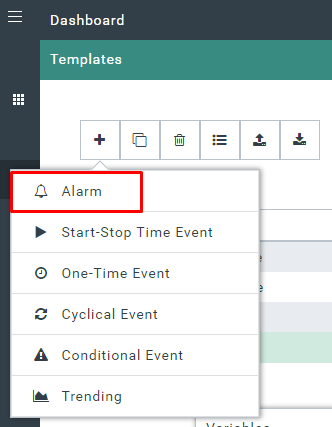
- From the Dashboard go to the Alarms App and create a new alarm template
- Specify a name and the path extension. The path extension will determine where in the project tree the alarm and its corresponding condition and actions will be located.
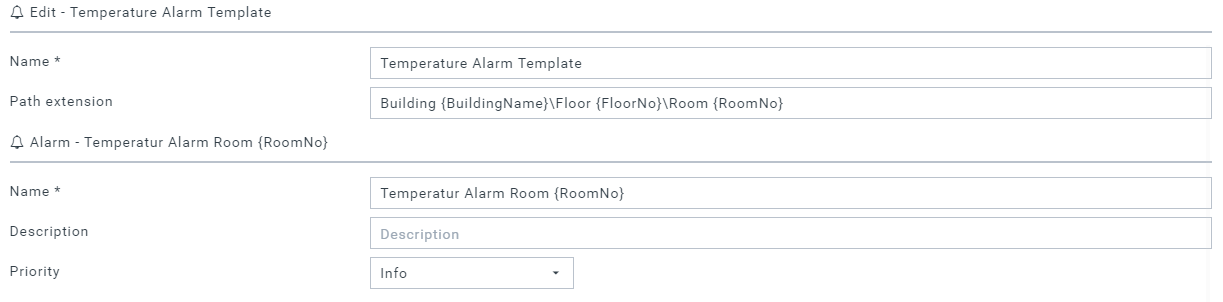
- Set up the alarm condition and actions. Insert variables in ItemIDs and other strings when required.
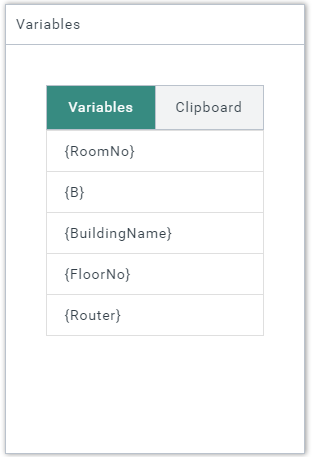
In the Templates App, a 2-tabbed floating window assists in variables handling:
- The Variables tab holds a list of all defined variables in the current template.
- The Clipboard tab holds a list of all recently copied text.
In this example each alarm has its own path and name. Variables in curly brackets { } will be assigned differently to each alarm based on definitions in the Excel definition file later on.
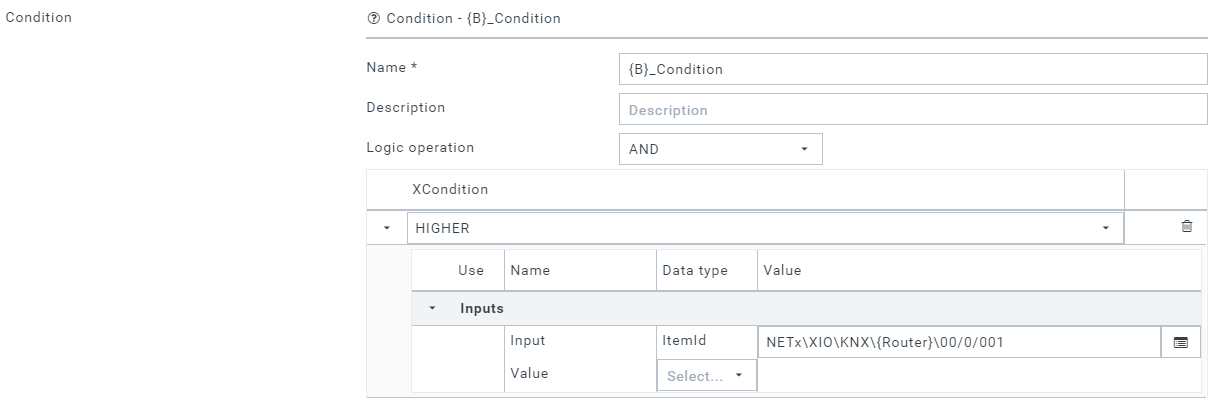
Condition
To create an Alarm we need a Condition and an Action to appear when the Condition is fulfilled. And maybe an Action on Vanishing. In this tutorial the condition is Temperature > 50 °C. The value of Temperatur is the predefined Virtual Item. Also in Condition Variables can be defined and and assigned based on the Excel definition file.
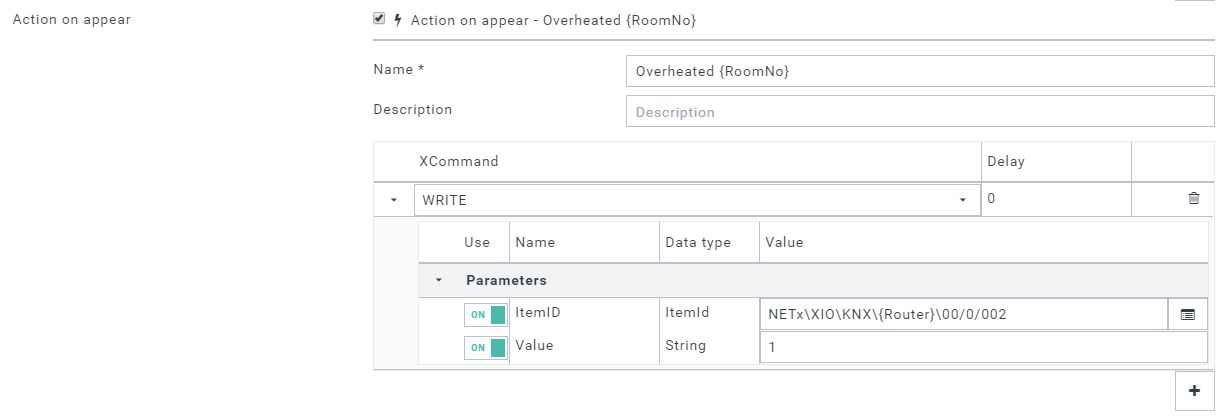
Action on appear
This action will be called when the alarm is triggered by the alarm condition changing from false to true. Here, the action uses the XCommand function WRITE to set the value of 1 in the selected item on. The actual used ItemID will be changed based on the Excel definition file.
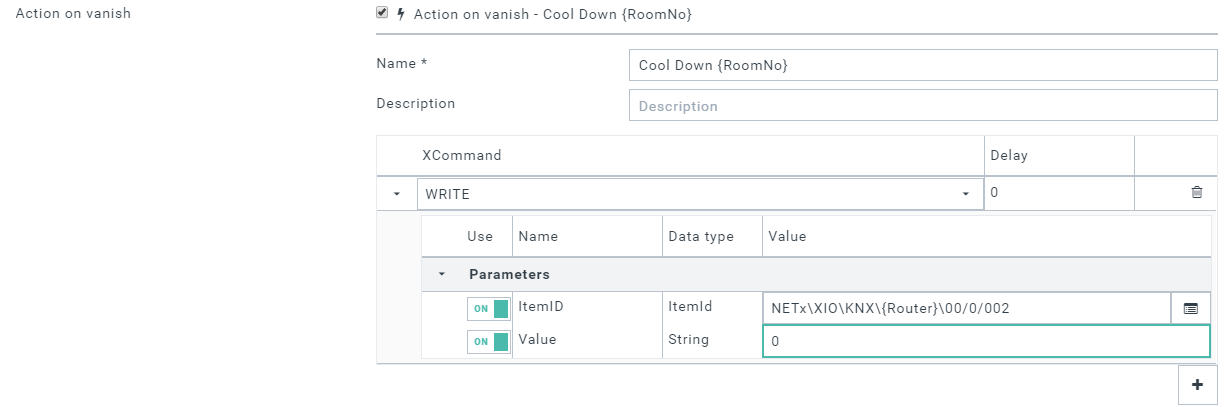
Action on vanish
This action will be called when the alarm condition vanishes. Here, the action uses the XCommand function WRITE to set the value of 0 in the selected item. The actual used ItemID will be changed based on the Excel definition file.
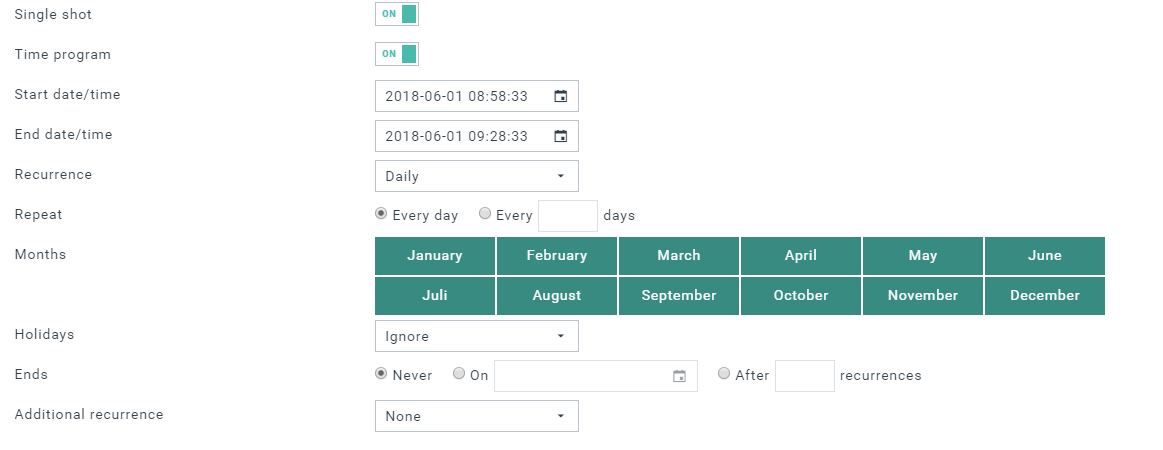
Other parameters
- Single shot: set to ON so that the alarm is fired just once when the condition is fulfilled.
- Time program: Defined schedule for this alarm to be enabled.
Apply the template
- Apply the template by going to Explorer App and click the Apply Template icon
 from the toolbar. The Templates window will show up and a list all saved templates is shown.
 - Choose the Temperature Alarm Template and click the Export Excel-Template button. An Excel file is generated and available for download. This file can be used to define the values of the variables used in the template.
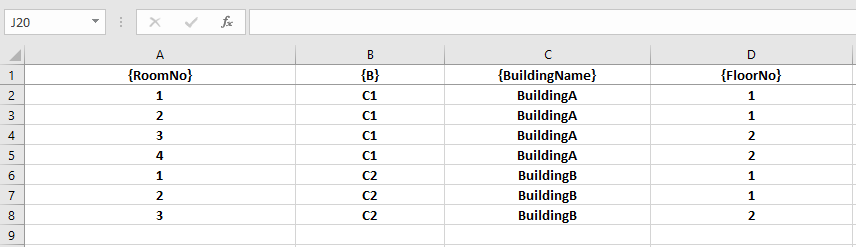
- Save the changes in Excel.
- Back to the Web Manger and in the Apply Template window, select the Excel file. A preview of the Excel file appears in the Preview section.
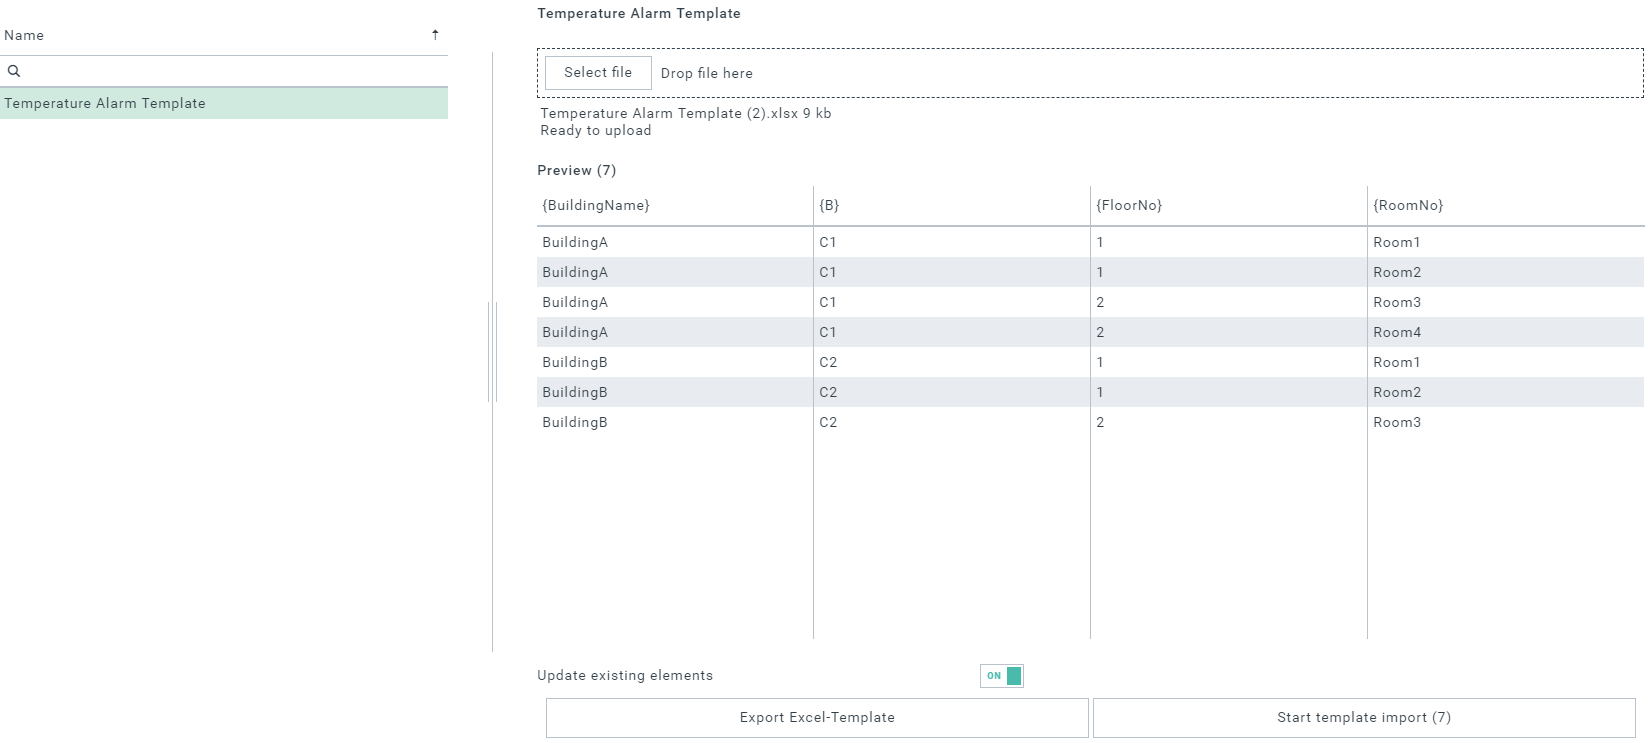
- Click Start template import to import and generate the alarms with corresponding conditions and actions. For each line in the Excel file an alarm is created.
- After the template import a Summary window gives overview of created alarms, conditions, and actions.
- In the Project Tree the generated folders, alarms, conditions, and actions look like this: